You may have heard about the typical ways to set goals, resolutions, and plans. A popular way of doing some “intention-setting” is by creating a vision board. Maybe you’ve heard of vision boards, or maybe you haven’t - either way we can help you set up the best vision board for you and your goals.
A vision board is a visual representation of your goals. Those goals can be professional, personal, spiritual, and creative, all compiled into one poster-like “board,” so that you can feel connected to and inspired by your goals through the imagery.
Let’s break down how you can make your own vision board, minus some of the “woo” which is typically associated with setting intentions. No crystals or burning sage necessary for this vision board project, but here's a lovely picture of some candles!

A vision board can be made of images cut out of magazines
The Digital Vision Board for the Type-A People
If you're looking for a quick way to create your vision board, then using a design program like Canva might be your best bet. Canva is a graphic design platform. It's FREE to open an account, and super easy to use.
Many people like to save pins on Pinterest that represent a goal they have. Sometimes, those images are of a place that you want to vacation, a skill that you want to learn, a quote that you want to live by, an item that you want to save up for, and so on. The sky, and your creativity, are the limit.
To create a vision board in Canva:
- Save your images on Pinterest, and then download those images to a folder on your computer, or to your phone. It’s best to try and keep these images in one place for easy and quick access when it's time to upload them to Canva.
- Open the Canva app, and then choose a large blank option. You can opt for vertical or horizontal, depending on what you’re going for. Many people like to print out their digital vision board and hang it up in a space where they seek inspiration. Or you can always make your vision board the background of your phone or computer, so that it’s always on your mind.
- Create a vision board folder within Canva, and then upload your photos into the folder for easy access within the app.
- Start to create the layout. You can use a grid layout option found in Elements, then select Grid. You can choose how many images you want, and can arrange text within your vision board, or create a placeholder for your word or main intention for the year.
- Get creating! You’ve got the layout, the images, and the inspiration. Now you can start organising your photos, colours, and text on your vision board.
A digital vision board is a great option for those that like clean lines, simplicity, and less mess. The great thing about a digital vision board is that you can change it as the inspiration arises and as goals shift - that’s not quite as easy to do with the traditional method. Let's get into that.
The Traditional Vision Board
The vision boards of yore (just kidding, they’re still super popular) are made using tangible objects like poster board, paper, magazines, scissors, and glue.
The physical vision board option is great when you are creating vision boards with a group of people - everyone gathers around with piles of magazines and their materials, and then they get to cutting, chatting, and dreaming out loud and in their thoughts.
These vision boards can feel inspiring because of the effort put into them, as well as the surprises that come up along the way, like finding an inspirational quote or a word in a magazine that you wouldn’t have considered, but love.
The Steps to Creating a Traditional Vision Board are:
- Gather your materials - you don’t have to do this in a group. You’ll need magazines, poster board of some variation, scissors, tape or glue, and any other materials you want to add - glitter is always fun.
- Start the search. Instead of pinning images, you are cutting them out of the magazines as you find them. Utilise a real-life folder here to keep track of your images and text.
- After you’ve gathered the images that you want, you can start laying them out on the poster board. You can create the layout as you go if you want, but there’s a chance you might lose some of the pieces, depending on how organised you are, because there will be magazine clippings all over the place.
- As you start to lay out your design, you’ll clearly see where there are gaps, where you want white space, where you want images, and where you want words. Once you have the design complete, you can start gluing or taping things down, depending on your preferences.
And that’s it! Once you’ve created your traditional vision board, you can hang it up where ever you like, or create it directly in your Ponderlily Planner - we made space for that! Magazine clipping vision boards are a little less versatile on tweaks, but you can always glue over old images if you want to change things up.
Where to Place Your Vision Board
There are plenty of places where you can keep your vision board for easy visual access and inspiration. Maybe you’ve created a massive poster board that would look lovely housed over your desk or in your office.
What we’ve found as the best way to stay inspired and on track to actually meet your goals is by keeping your vision board inside your daily planner. This encourages you to stay consistent with using your diary or journal, while also offering motivation to open it up and start tracking your time, goals, and successes.
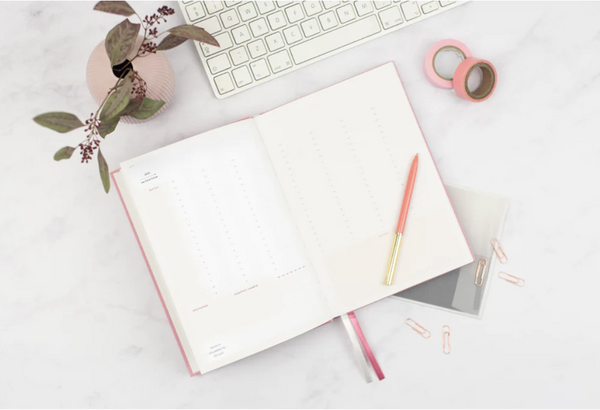
For a planner that can meet all of your needs of housing your dreams and helping you achieve them, you can find eco-friendly (from cover-to-cover) planners right here at Ponderlily.
Ponderlily Planners are thoughtfully designed, and offer style in the form of thick recycled paper and cloth covers, and sustainability with mindful manufacturing practices, while bringing you monthly check-ins towards meeting your goals.
Soy-based ink and recyclable paper are used in Ponderlily Planners, as well as eco-friendly packaging. There is space in each Ponderlily Planner to write out your intentions, to-do lists, and notes, while also reminding you to recharge. You’ll find a pocket in the back cover to store your keepsakes, or maybe even your vision board.
Ponderlily Wall Calendars are also a great resource for visualising your goals and sticking to it! See all of your items from a “bird’s eye” view and keep on top of it all.

Use your Ponderlily Wall Calendar to visualise your goals
Creating a vision board allows for laser-sharp focus, because you can see exactly what it is that you want to achieve. It’s one thing to have the thoughts and goals in our mind, and another to see a tangible object or image in front of you to keep you inspired.
Vision boarding is a great way to get the creative juices flowing and help you on your way to meeting all of your goals for the new year.

Place your Ponderlily Wall Calendar somewhere you see it daily
So make some time for yourself these next few weeks and create your vision board! We can’t wait to see what you create and be sure to tag us on Instagram so we can see!